Blog

Read blog posts about lenticular from our team!

STANDING OUT AT RETAIL WITH LENTICULAR

05 26 2015


Virtual Images | By Jeff Horst

Navigating the endless rows of the store, unruly kids in tow, and a squeaky, chattering wheel on my cart all add to another lackluster shopping experience.  Everything blends together and I’m just going through the motions, adding the usual suspects to my cart.  As I stand there looking at the toothpaste and begin reaching for my standard choice, something grabs my attention out of the corner of my eye.  A sparkling flicker of movement and interactive graphics floating above the surface of the box redirect my selection to pick up this interesting new product.

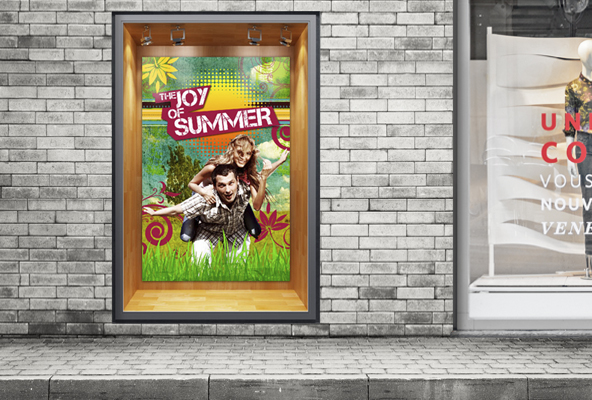
Once a consumer picks up your product, they are not only more likely to purchase it, but they are also willing to pay more for your product.  Touching the product increases the shopper’s level of ownership in your product and they are often more compelled to make the purchase.  Lenticular can be a powerful addition to brand-building packaging.  It calls out to the consumer with its eye-catching graphics and offers a play factor that creates brand engagement like nothing else.

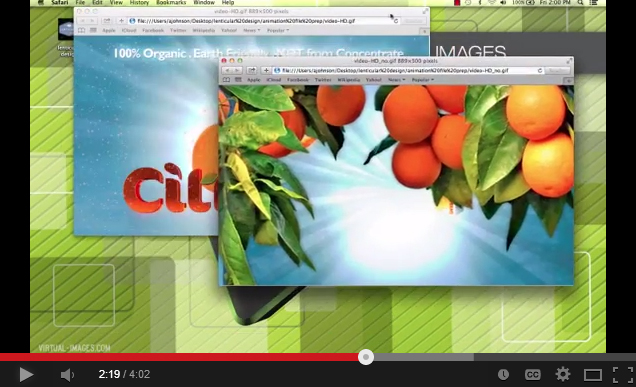
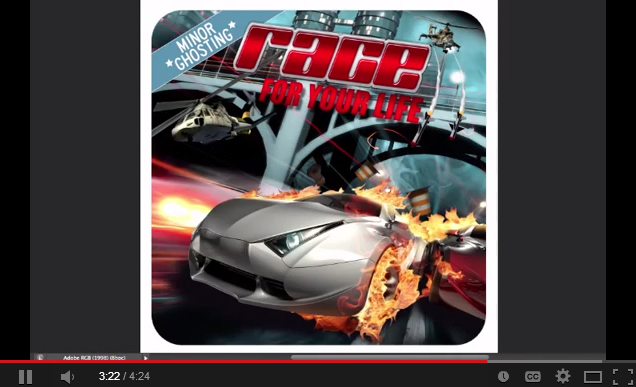
After 15 years of designing for lenticular, I still find myself picking up and playing with lenticular packaging.  Whether your enhancing your package with a small animating sticker, a large 3D graphic that appears to reach out into the aisle, or a insanely cool collectible card, the end result of grabbing the consumers undivided attention is the same.
Once again I’ve been drawn in by lenticular and the new toothpaste is in my cart.  The affinity I felt for this brand at that decision making moment can be directly linked to the lenticular, as I’m sure I would not have noticed it otherwise

ENGAGING THE CONSUMER

03 11 2015


Virtual Images | By Jeff Horst

Walking by the outside of a store I notice a group of people looking at something in the window  The audience is entranced, they’re reaching out and grabbing at what appears to be nothing.  I move closer and see what has captured their undivided attention.  It’s a lenticular large format poster hanging proudly in the store front of a popular sports retailer.  Everyone is instantly mesmerized by elements that seem to be moving and floating off the surface of a printed sign. I too find myself enamored with the experience and before I know it, I’m the one reaching out.  I curiously head into the store to see what they have to offer.

Getting consumers in the store is first step to growing sales and creating a loyal customer.  Our experience has been that lenticular signage creates an engaging experience for the consumer that leaves a positive and lasting impression of your brand.  Being able to draw in a potential customer with animation and depth as they walk by your store and then convert them to an in-store visitor right on the spot is what lenticular does best.

Through large format lenticular and point of purchase signage, you can engage an audience in a new and purposeful way.  As a lenticular designer, I am always fascinated that I too am still drawn in by lenticular signage.  I’ve seen great uses of lenticular in everything from life size signs to small shelf talkers, and all of them consistently grab my attention like nothing else.

People are instinctively drawn to things that move, so adding animation or 3D effects to signage is another great way to drive them toward products of interest.  I look back at the lenticular sign that drew me in and know that many others were also beckoned into the store by the enticing display.

tags: Retail

DEPTH BUDGET AND FOCAL POINT

12 01 2014


Virtual Images | By Jordan Falk

In stereoscopic (3D) cinema, stereographers often discuss the use of a “depth budget” when composing a scene. A depth budget is the total amount of z-axis space that a viewer can comfortably view. Viewing 3D can be immersive and exciting, but can also be confusing and physically uncomfortable if the 3D is poorly done or too extreme.  For this reason it’s important to understand how stereoscopic vision works, and how to design with this depth budget in mind.
 

Typically there are background elements, focal elements, and foreground elements that make up a total depth budget.  Background elements appear to recede behind the viewing surface (movie or TV screen, or piece of lenticular lens) of an image.  Background depth works the same way for a viewer’s eyes in projected and lenticular 3D, with the left eye seeing the left part of a stereo pair or sequence, and the right eye seeing the right part. This is referred to as “positive parallax” and typically can handle a larger degree of separation between stereo images than foreground 3D, or “negative parallax.”  Negative parallax results in elements appearing to float in front of the viewing plane, and is usually used for the “Wow that’s really 3D!” moments in a 3D film or image; for example swords poking out at the viewer, balls shooting out into the audience, or other moments where elements seem to impede beyond the constrains of the screen they are displayed on.
 

While this effect is certainly exciting and novel, it can be uncomfortable and cause a viewer some eye strain if used in excess.  For these reasons we generally suggest a depth budget of approximately 75% background 3D and 25% foreground.  It is also a best practice to keep the most important elements on or near the focal plane, where the viewer naturally focuses their view, and will have the most comfortable viewing experience.  Use background and foreground elements to build out the scene and add visual interest, and treat the primary elements, like logos, key text and/or main character elements as the central focal point that everything pivots around.

tags:

DESIGN CONSIDERATIONS FOR LENTICULAR 3D: NEGATIVE SPACE

11 24 2014


Virtual Images | By Jordan Falk

In traditional graphic design we are taught to balance imagery and text with “negative space”.  Negative space is important to help drive viewer focus to specific areas of a composition, balance out busy or vibrant areas of a composition, and give the viewer’s eye a place to rest.

Traditional media only allows for composition in two dimensions, a horizontal (x) and a vertical (y) axis. Positive and negative space are generally defined as the existence or lack of message-driven content in a composition within the x and y plane on a flat surface.  With the addition of a third depth (z) axis, a designer should reconsider how to incorporate positive and negative space into their design.
 

Auto-stereoscopic 3D (stereoscopic 3D without the use of glasses) allows the viewer to have the sensation of looking around or behind objects.  Because of auto-stereoscopic 3Dsuccessful 3D compositions are typically busier than their 2D counterparts. By adding additional visual elements to a 3D composition, the designer allows for increased interaction between elements on multiple planes of depth, thus improving the 3D effect.  There is additional negative space along the “z” axis in a 3D composition and the viewer will still get a pleasing sense of negative space behind and between elements on different planes of depth.
 

In short – a 3D lenticular design should be “busier” than a 2D design to make effective use of the medium.  The extra visual real-estate provided by the z-axis will provide additional negative space between objects on different levels of depth.

tags:

IS THERE EVER TOO MUCH LENTICULAR?

10 31 2014


Virtual Images | By Jeff Horst

Don’t try to shove ten pounds of lenticular in a five pound bucket.  Each lenticular lens can only handle so much animation before it starts to get blurry and confusing to the viewer.  Most of the time a powerful, clean two phase flip will produce a better result than trying to jam five phases into your animation.  Choosing the right lens is also important, if you want to try something out of the norm because each lens has a specific number of maximum frames you can use and is designed to handle different types of effects.
 

Reach out to us if you have questions on which lens would work best for your specific design.

When you draw a line in the sand…

10 03 2014


Virtual Images | By Jeff Horst

If you have to draw a line in the sand, make it thick.  Whomever said “thin is in” doesn’t work with lenticular.  Because of the inherent bumps on lenticular, thin lines and small text tend to break up under the lens, causing a jagged or stair stepped look. 

To help eliminate that you can increase your line thickness, bump up the size of the text and use non-serif fonts.  A general tip is to use a 1 pt. or above line and don’t use fonts under 10 pts.  Keep in mind that Barcodes and QR codes will work under the lens with certain size and placement considerations.

HOW DO YOU SET UP FILES FOR ANIMATION?

09 19 2014


Virtual Images | By Adam Johnson

Full motion video or multi-phase uses multiple frames of an action or illustration showing movement from beginning to end. Full motion is much like watching a movie clip in the palm of your hand. This effect is best optimized when the background remains constant throughout the sequence.
 

Click here to watch this tutorial video to learn more about lenticular and animation. 

tags:

SET UP YOUR FILES FOR A LENTICULAR FLIP

09 12 2014


Virtual Images | By Adam Johnson

An image flip is also know as a 2-Phase or 3-Phase. Though it is the simplest of all animation effects, it is often the most effective. Lenticular flip technology allows up to three separate images to be combined and seen independently when viewed at different angles.

Click here to watch this tutorial video to learn more about lenticular and flip effects. 

tags:

LOTS AND LOTS OF LAYERS

09 01 2014


Virtual Images | By Jeff Horst

This is the first in an eight part series that offers tips and tricks for designing for lenticular.  Or, as I like to call it, 8 Things You Should Know Before You Design Your Super Sweet Lenticular.  In the first installment we’ll talk about why layered artwork files are so important.

Just like a good taco dip, lenticular needs a lot of layers.  Sending a file with layers is sometimes tough for designers, because it gives up an element of control.  They could move something. They could change something.  Lenticular is such a strange animal that we often have to slightly tweak things to make them work better under the lens.  If your file has layers, it’s a much easier process.  In the case of 3D, we have to have layers to create the depth.

If you ever question if you have too many layers...you don’t.  We’d rather have to take 5 minutes merging some layers together, than spending 5 hours cutting apart and cloning your artwork to create layers.  With a photograph, it can’t be avoided, but if you’re creating with layers, it’s best if you send it as layers.

LEARN HOW TO SET UP YOUR FILES FOR 3D

07 22 2014


Virtual Images | By Adam Johnson

Compositions with lots of layers and a good depth of field work best for 3D.  Build layouts with lots of background and foreground elements that can be used to add depth to your piece without sacrificing the clarity of critical message elements.

Click here to watch this tutorial video to learn more about lenticular and 3D.

What is Lenticular?
Why Use Lenticular
Lenticular Design Expertise
Resources